
Learning Vue, Part 2 - Expanding my knowledge
Second post in the series - build a simple Vite app, add SEO meta tags, and learn forms, props, and emits.
If you haven’t read the previous article, I have a 3 part series about my journey to learning Vue.js. The purpose of this initiative is to learn just enough so that I’ll be able to build and deploy a simple app with Vue.js.
Read the previous post here: https://lostcause.dev/blog/learning-vue-part-1-getting-started
Let’s build the app
Until now, we have a working app, and I also created a Button component that increments a number.
I’m too impatient, so let’s skip some topics for now, and learn more about building the app.
The simplest way to build the app is by running npm run build. The npm command runs vite build which builds the app. If we run this command, we end up having a working static HTML app.
There’s one problem though: this build isn’t ideal for SEO, because the bots aren’t executing the JavaScript. Most often they only analyse the HTML:
<!DOCTYPE html><html lang=""> <head> <meta charset="UTF-8"> <link rel="icon" href="/favicon.ico"> <meta name="viewport" content="width=device-width, initial-scale=1.0"> <title>Vite App</title> <script type="module" crossorigin src="/assets/index-ym-c9gok.js"></script> </head> <body> <div id="app"></div> </body></html>If we create a component in Vue that contains page details, it’ll be available only after executing the JavaScript code (in this case index-ym-c9gok.js which is a minified version of the app).
So how do we make it SEO friendly?
I found two solutions: one that’s simpler, and another one that implies learning Nuxt.
Even though Nuxt is a well known framework, I’m willing to learn this after building the simple app with Vue. So I think I’ll pick the first option.
I asked Claude, and it said that the simple solution is actually the right approach. I have doubts, but for how, if it works, I’ll stick to it.
So what’s the simple solution? I assume that if I add the SEO keywords (or basically any tag) directly in the index.html , they should appear in the final build. Let’s see if it works 🤞
This is the new index.html, containing the new title, og:title and og:description tags:
<!DOCTYPE html><html lang=""> <head> <meta charset="UTF-8"> <link rel="icon" href="/favicon.ico"> <meta name="viewport" content="width=device-width, initial-scale=1.0"> <title>Simple Vue Tool</title> <meta property="og:title" content="Simple Vue Tool"> <meta property="og:description" content="Simple Tool built with Vue while learning the library"> </head> <body> <div id="app"></div> <script type="module" src="/src/main.js"></script> </body></html>And this is the built index.html:
<!DOCTYPE html><html lang=""> <head> <meta charset="UTF-8"> <link rel="icon" href="/favicon.ico"> <meta name="viewport" content="width=device-width, initial-scale=1.0"> <title>Simple Vue Tool</title> <meta property="og:title" content="Simple Vue Tool"> <meta property="og:description" content="Simple Tool built with Vue while learning the library"> <script type="module" crossorigin src="/assets/index-ym-c9gok.js"></script> </head> <body> <div id="app"></div> </body></html>So it worked 🎉
Forms, props and emits
What really helped me understand these topics is the experience I accumulated while writing Angular and React code.
The principles kind of apply to the majority of frameworks. If you’re new to this, maybe give it a bit more time.
I spent some more time reading the documentation and trying things out, and I have a working form. Check it out:
<script setup>    import { ref } from 'vue'
    const emit = defineEmits(['onFormSubmit']);    const props = defineProps(['initialFirstName', 'initialLastName']);
    const firstName = ref(props.initialFirstName);    const lastName = ref(props.initialLastName);    const submitted = ref(false);
    function onFormSubmit() {        submitted.value = true;
        const payload = {            firstName: firstName.value,            lastName: lastName.value        };
        emit('onFormSubmit', payload);    }</script>
<template>    <form @submit.prevent="onFormSubmit" :class="submitted ? 'submitted' : ''">        <p>User Details</p>        <label>First Name: <input type="text" name="firstName" placeholder="First Name" v-model="firstName" /></label>        <label>Last Name: <input type="text" name="lastName" placeholder="Last Name" v-model="lastName" /></label>        <button type="submit">Submit</button>    </form></template>
<style scoped>    .submitted {        background: #aaffaa;    }</style>
And this is how the Form component can be loaded:
<Form @on-form-submit="formSubmitHandler" initial-first-name="John" />This is how it looks before submitting the form (do notice the initial value that’s been passed for first name input):
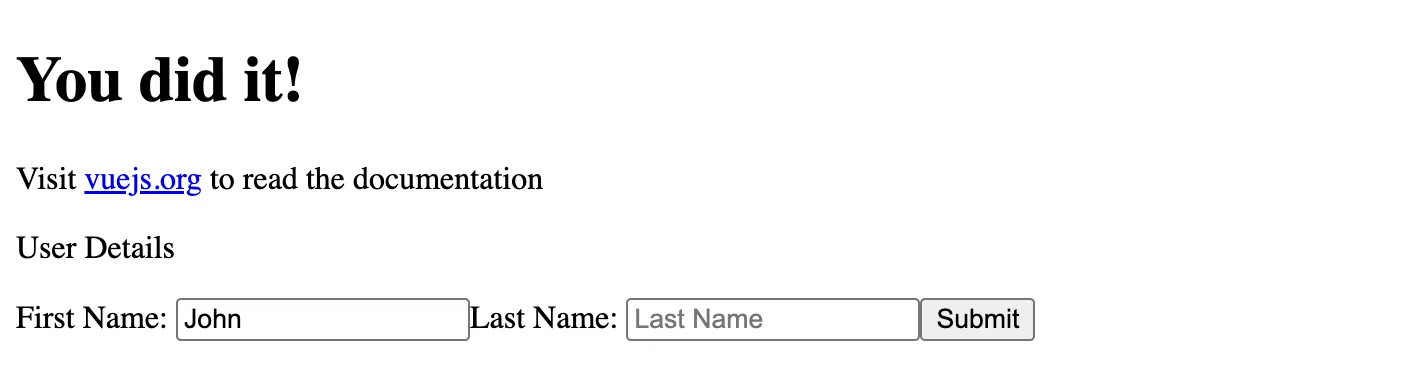
And after submitting the values:
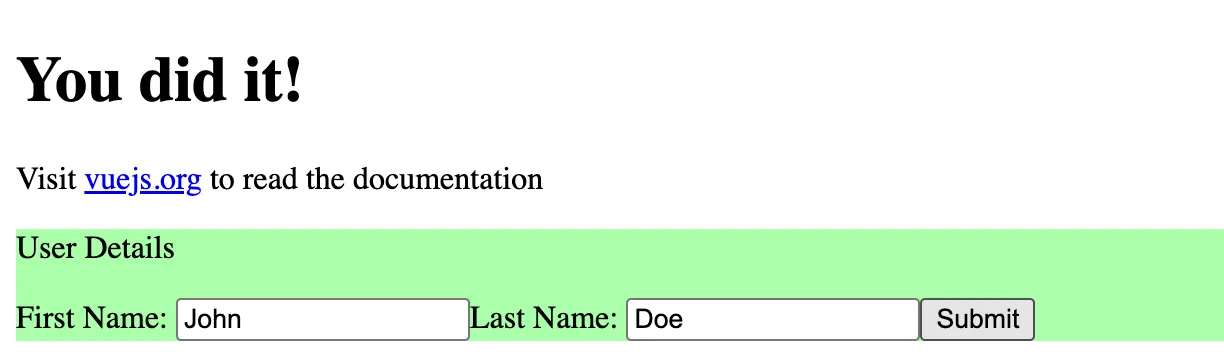
These are some topics you might want to check out:
- defineEmits - this is one way of defining event emitters in the child component to send a value to the parent component. In the example above, the values from the form are passed to the parent component through the event emitter called
onFormSubmit - defineProps - this is the way of passing values from the parent component to the child component. Based on the documentation, this is a well known pattern: passing the initial value on a prop, then doing the calculation within the child component
- @submit.prevent - this is a form event emitter we use to change the initial behaviour of the form: we want to handle the form submission in our function, and this is how we do it
- :class - by using this attribute, we can toggle a class on the form tag whenever the
submittedref is true
These are some basic features of Vue, and I think they are a great starting point. I definitely need to take a deeper look at more properties that are available in Vue, and that’s what I recommend you do as well.
Recap
So let’s review what we achieved so far:
- ✅ Understanding project structure - This got addressed in the previous post.
- ✅ Basic features (rendering values, calling out functions) - Now we have a better understanding of how to pass values from one component to another and how to attach different handlers.
- ✅ Component creation and usage - We created more components, and for the purpose of building a simple app this should be alright.
- ✅ Capturing user input - So far we captured click event, form submit, and also input change. It’s a good start.
- ✅ Build process - Here we’ll follow the simple solution: passing the SEO meta tags directly to the
index.html. For more advanced use cases, I think using Nuxt is required.
Thank you for reading, and I’m so excited to put into practice what we learned. In the next post we’ll build a small tool with what we learned, so definitely stay tuned!
